There’s a reason old Halloween decorations feel warmer than anything sold in a big-box seasonal aisle today. Faded orange cardstock, hand-painted ceramic, and slightly wobbly paper folds carry a kind of imperfection that mass-produced plastic just can’t fake. Leaning into that look — worn textures, muted color palettes, and cheerful rather than gory faces — is what makes a retro Halloween display feel like it was collected over decades instead of bought in a single afternoon.
Whether you’re chasing a specific decade or just want your home to feel like it belongs in an old Halloween postcard, these fifty ideas cover every room and every era, from 1950s paper goods to 1980s blow-molds and neon-drenched ’70s kitsch.
Timeless Paper and Die-Cut Classics
1. Oversized Black Cat Die-Cuts on the Wall
Large arched-back cats with bright eyes and a slightly exaggerated grin instantly read as old-school Halloween. Reproductions with a softened, slightly faded color palette look far more authentic than anything printed in bright, saturated ink.
Designer tip: Hang a cluster at slightly different heights along a stairway or hallway wall so the cats appear to be climbing, rather than lining them up in a rigid row.
- Shop specialty party suppliers or online vintage-reproduction shops for Beistle-inspired die-cuts.
- Use tape loops or repositionable adhesive dots so the paper doesn’t tear when you take them down.
- Combine two or three sizes on one wall for a layered, collected-over-time effect.
Quick win: A gray colored pencil lightly rubbed along the cut edges ages a too-crisp reproduction in seconds.
2. Grinning Pumpkin Cutouts on Cabinets and Windows
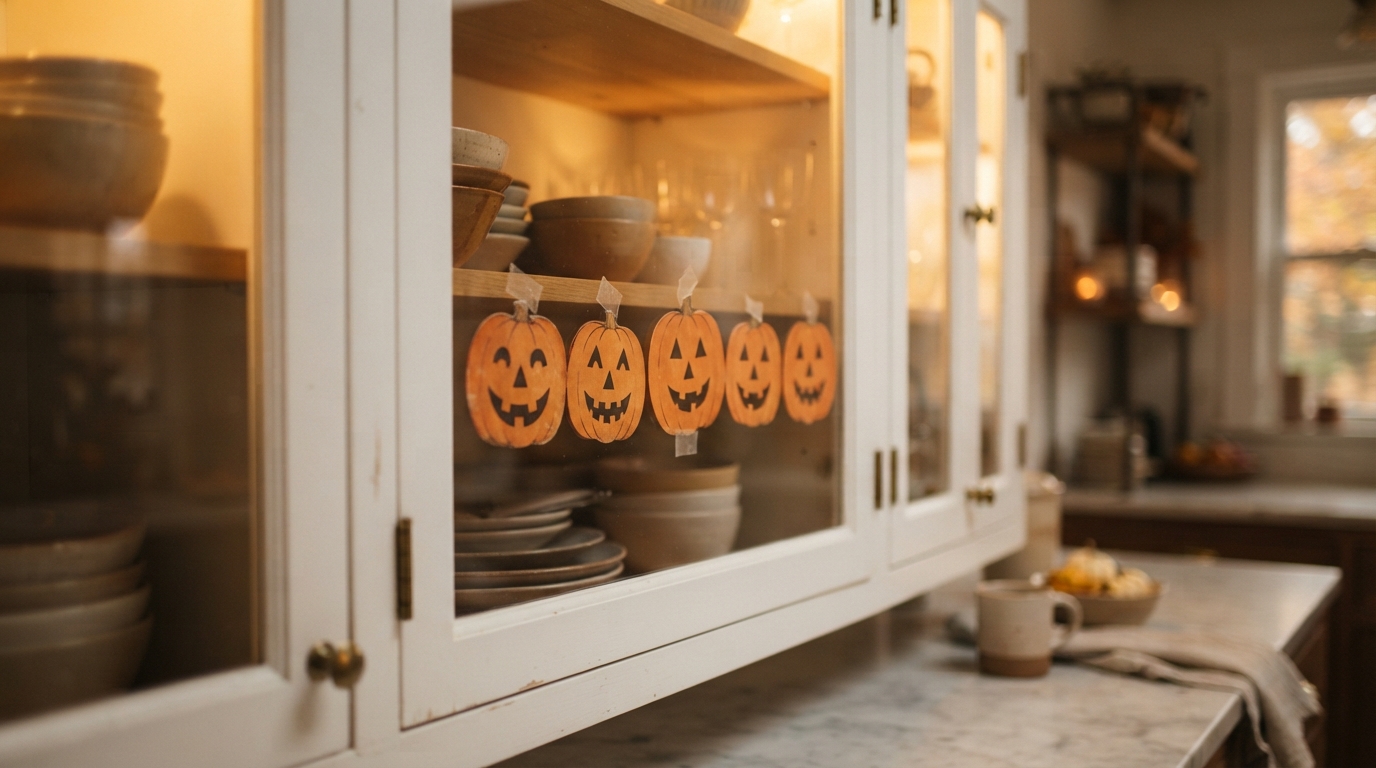
Simple, cartoon-faced pumpkins taped to glass cabinet fronts or windowpanes bring instant charm without committing to a full room overhaul. The friendlier the expression, the more nostalgic the effect.
Designer tip: Rotate the cutouts through your glass-front cabinets so the display changes slightly every time a door opens or closes.
- Choose heavier cardstock versions so they survive storage and come back next year.
- Back thin paper cutouts with black construction paper to add durability and contrast.
- Vary each pumpkin’s expression rather than buying a single repeating design.
Quick win: A dab of removable glue dot in each corner keeps cutouts flat against glass without visible tape lines.
3. Honeycomb Tissue Pumpkins on Shelves and Mantels
The pleated, accordion-style paper pumpkins that pop open into a rounded shape are a mid-century staple. Adding a paper face, a witch’s hat, or a pleated collar turns a plain honeycomb ball into its own little character.
Designer tip: Group three in ascending sizes rather than lining them up evenly — the height variation reads as intentional styling instead of leftover party favors.
- Buy variety packs so you always have a filler piece for empty spots.
- Store them flat by unclipping rather than folding, which prevents crushed pleats.
- Reserve delicate honeycomb pieces for shelves out of reach of pets and toddlers.
Quick win: A cool hairdryer setting gently clears dust from the folds without flattening them.
4. Standing Accordion-Fold Paper Witches
These folded paper figures — often with striped stockings and a pointed hat — look like party favors pulled straight from an old catalog. Their charm comes from the slightly clumsy, homemade proportions.
Designer tip: Tuck one between hardcover books on a shelf so only the hat and face peek out, turning it into a small surprise rather than the main event.
- Look for reproduction brands that still use hand-illustrated faces rather than clip art.
- Fully expand the paper base before setting the figure down, or the hat will tip it over.
- Add a coin or a bit of sand to the inside base for stability near doors and vents.
Quick win: A dot of double-sided tape on the feet keeps standees upright on slick shelving.
5. A Small Gallery of Vintage Halloween Postcards

Reproduction postcards featuring witches on broomsticks, grinning moons, and black cats make for an easy, low-commitment art wall. Framing them in mismatched vintage-style frames makes even a handful of cards look like a real collection.
Designer tip: Keep the frames close together in a tight grid — the density is what makes a small set of postcards feel substantial.
- Search for curated postcard sets online so the designs share a cohesive color story.
- Choose frames with mats so the small cards don’t look lost in oversized frames.
- Swap in for your everyday framed photos each October to avoid extra wall holes.
Most people skip this: Acid-free photo corners protect the paper far better than tape or glue ever will.
Retro Halloween Mantel and Shelf Styling
6. A Miniature Orange-and-Black Ceramic Village
Small ceramic houses paired with bottle-brush trees create a tiny, glowing town across a mantel. The hand-painted imperfections on each little building are what sell the vintage look — a factory-perfect finish reads as new.
Designer tip: Stagger the rooflines with small blocks hidden underneath so the village has real depth instead of sitting flat.
- Thrift stores and estate sales are a reliable source for collectible ceramic pieces.
- A short string of warm white lights tucked behind the houses lights the windows without candle risk.
- Cardstock houses are a lightweight substitute for narrow or floating shelves.
Quick win: Keep the tallest pieces centered so the eye has a clear anchor point across the whole mantel.
7. A Glowing Ceramic Halloween Tree
A ceramic tree finished in black or burnt orange glaze, strung with tiny pumpkin- or ghost-shaped bulbs, bridges Halloween and the cozier holidays that follow. It’s an easy standalone centerpiece for a side table.
Designer tip: Set it near an outlet so cords stay hidden, and let it be the singular glowing object in that corner of the room.
- New reproductions are widely available and far gentler on the budget than true vintage pieces.
- Older wiring may run hot — swap in low-heat LED replacement bulbs where possible.
- Keep the piece on a stable, flat surface away from foot traffic.
Best shortcut: A dab of clear craft glue secures a loose plastic bulb peg for good.
8. A Moody Antique Clock Vignette
An old mechanical mantel clock instantly adds gravity to a Halloween display. Draped lightly with thin faux cobwebs and flanked by tall black taper candles, it looks like something discovered in a forgotten study.
Designer tip: Set the clock hands to a suggestive hour — just before midnight works well — to hint at a story without any obvious props.
- Non-working antique clocks at estate sales are often the most affordable option.
- Stretch cobweb fiber thin with a dry paintbrush so it looks airy, not clumped.
- Battery-operated taper candles avoid wax dripping onto irreplaceable wood casing.
Most people skip this: Metallic candle holders in brass or silver add just enough shine against dark wood.
9. A Lineup of Classic Blow-Mold Pumpkins
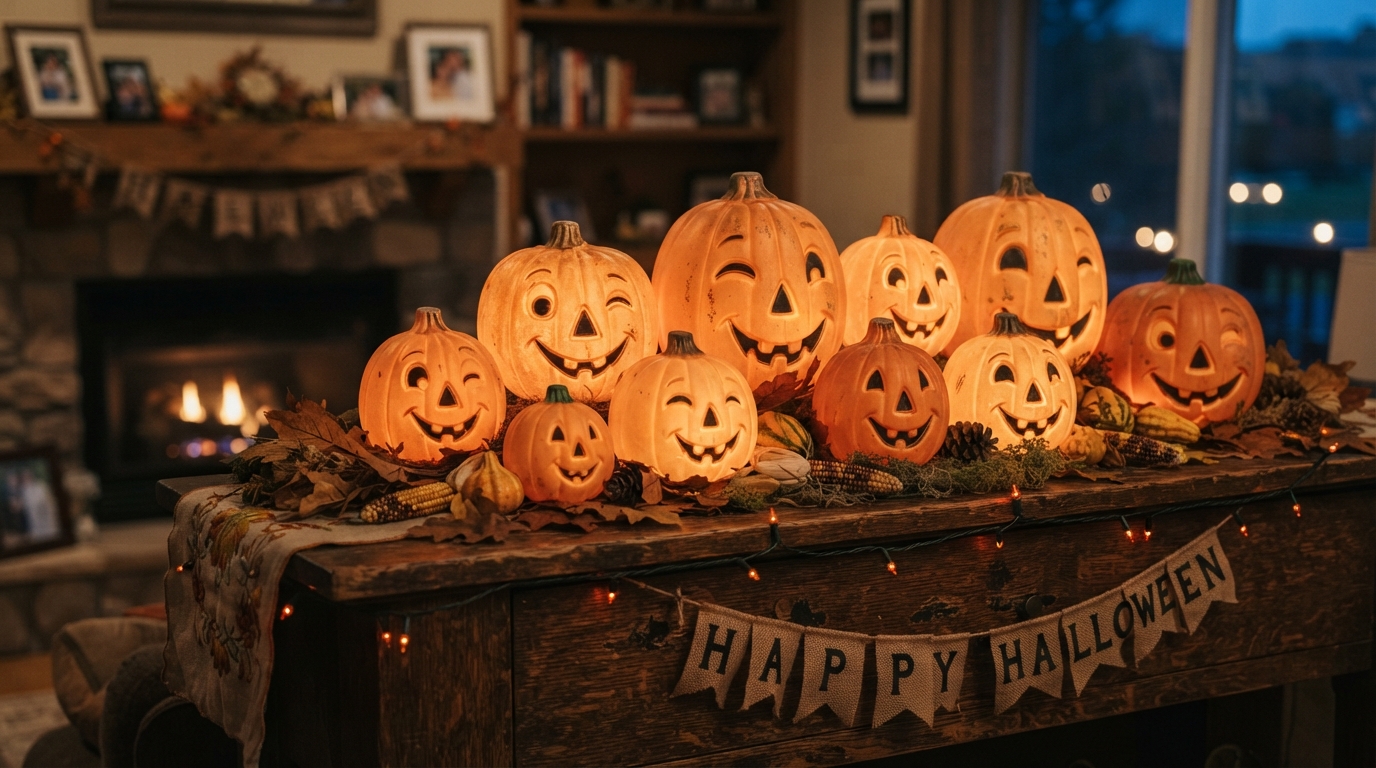
The glowing plastic pumpkins associated with old neighborhood trick-or-treating are having a real comeback. A cluster of different sizes and expressions fills a corner or hearth with instant, cheerful nostalgia.
Designer tip: Mix expressions rather than buying identical units — the variation is what makes it look like a real accumulated collection.
- Original mid-century molds are sometimes stamped on the base with the maker’s name, which helps with authentication.
- These are bulky in storage, so a labeled bin saves a lot of seasonal frustration.
- New reproductions offer nearly the same glow for a fraction of vintage prices.
Quick win: A timer-equipped outlet strip turns the whole group on automatically at dusk.
10. Stacked Vintage Books with a Small Pumpkin Topper
Old hardcovers in faded mustard, rust, and black make a surprisingly effective decorating base. Stacked by size with a small brass candlestick or figurine on top, the display feels scholarly and a little mysterious.
Designer tip: Turn a few spines inward to expose the yellowed page edges — that texture reads as age in a way a book cover alone can’t.
- Library sales and used bookshops are inexpensive sources for linen-bound hardcovers.
- Stack largest to smallest for a stable pyramid shape.
- Wrap modern books in plain kraft paper if you can’t find the right vintage tones.
Best shortcut: Choosing titles with a spooky or mysterious ring adds a hidden layer of detail for guests who look closely.
Vintage-Inspired Porch and Entryway Decor
11. Illuminated Pumpkin Blow-Molds Down the Steps
Lining porch steps with glowing plastic pumpkins recreates the look of a mid-century neighborhood on Halloween night. Mixed sizes and faces keep the display from feeling mass-produced.
Designer tip: Raise a few molds on low wooden risers so the row has rhythm instead of a flat, even line.
- Flea markets and online auction sites are good hunting grounds for older molds.
- Use only outdoor-rated cords, taped down securely against tripping hazards.
- LED replacement bulbs run cooler and safer inside aging plastic shells.
Quick win: One outdoor timer for the whole row means no manual switching at dusk.
12. A Tall Black Cat Porch Sign
A flat, painted plywood or metal cat silhouette beside the front door channels the plywood yard cutouts once common in suburban neighborhoods. A curved tail and an exaggerated, surprised expression sell the look.
Designer tip: Angle the sign slightly rather than setting it flush against the house — it stays visible from the street and casts a more interesting shadow.
- Weather-resistant plywood or powder-coated metal holds up best outdoors.
- Hide a brick or sandbag behind the base for stability in wind.
- A matte finish avoids glare from porch lights or passing headlights.
Most people skip this: A clear exterior sealant on the back of a wooden sign prevents warping from moisture.
13. A Wreath Made of Vintage Paper Masks
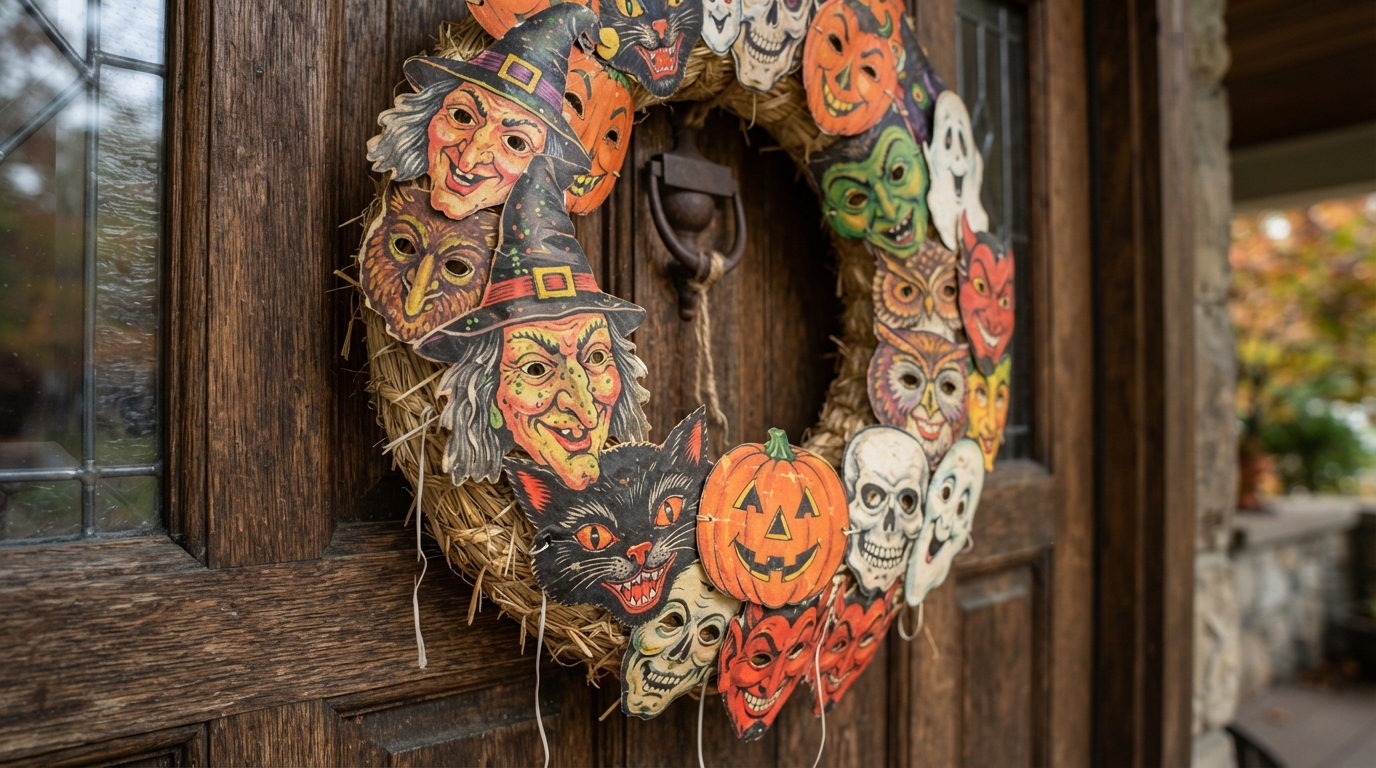
Old paper masks in bright, slightly mismatched colors make an unusually playful wreath base. Covering the whole form in overlapping faces turns a simple shape into a genuine conversation piece.
Designer tip: Wire the masks through their eye holes rather than gluing everything down permanently, so a few pieces can be swapped in future years.
- Reproduction masks protect any originals you’d rather keep as display-only collectibles.
- A grapevine or straw base gives the wire something sturdy to grip.
- A wide burlap bow at the top finishes the piece without extra cost.
Best shortcut: Hot glue is fine if you’re certain you won’t need the masks for costumes later.
14. A Giant Paper Witch Face on the Front Door
Turning an entire door into an oversized witch face — crooked hat, wide eyes, exaggerated nose and grin — is a bold, low-cost statement piece. The scale alone makes it the focal point of the whole house.
Designer tip: Use mounting putty rather than tape so the paper lies flat against the door’s texture without peeling paint on removal.
- Heavyweight cardstock or weather-resistant vinyl holds shape best outdoors.
- Laminating pieces protects them if the porch isn’t fully covered.
- Older postcards are a good visual reference for period-accurate proportions.
Quick win: A brighter background color behind the facial features makes them pop against a dark door.
15. An Old-Fashioned Trick-or-Treat Table
A small porch table set with a papier-mâché candy bucket, striped paper treat bags, and a hand-lettered “Trick or Treat” sign recreates a distinctly old-neighborhood welcome. A gingham cloth underneath adds extra warmth.
Designer tip: Position the table off to one side rather than directly in the doorway’s path so visitors can approach without squeezing past it.
- Reproduction pulp buckets echo early-twentieth-century designs closely.
- A weighted tablecloth clip keeps fabric from lifting in wind.
- Classic penny-candy-style treats reinforce the old-fashioned feel.
Most people skip this: A hidden battery candle inside the bucket lights the display after dark.
Retro Halloween Table and Party Decor
16. A Mid-Century Paper Party Tablescape
Layering orange paper plates over scalloped black mats, paired with striped straws and illustrated cups, recreates a classic children’s Halloween party table. Paper goods from this era were often sturdier than today’s disposable lines.
Designer tip: Add a paper noisemaker at every place setting so the table feels ready for an event, not just a meal.
- Curated reproduction sets save time hunting down individual matching pieces.
- Scalloped-edge plates instantly upgrade a basic paper-goods table.
- Easy cleanup makes this a practical choice for a full house of guests.
Quick win: A layer of black cardstock beneath each plate creates a custom border on a budget.
17. Ceramic Black Cat Candleholders
Arched-back ceramic cats holding taper candles bring a glossy, collectible feel to a tablescape. Even unlit, their painted eyes and expressive faces add color and personality.
Designer tip: Pair with cream or soft orange candles rather than stark white for a warmer, more period-appropriate glow.
- Antique malls and specialty retro shops are reliable sources.
- A heat-safe table runner protects finishes underneath lit candles.
- Mixing cat heights adds visual rhythm along a long table.
Best shortcut: A dab of florist’s wax at the base keeps tapers standing perfectly straight.
18. A Retro Glass Candy Bowl Centerpiece
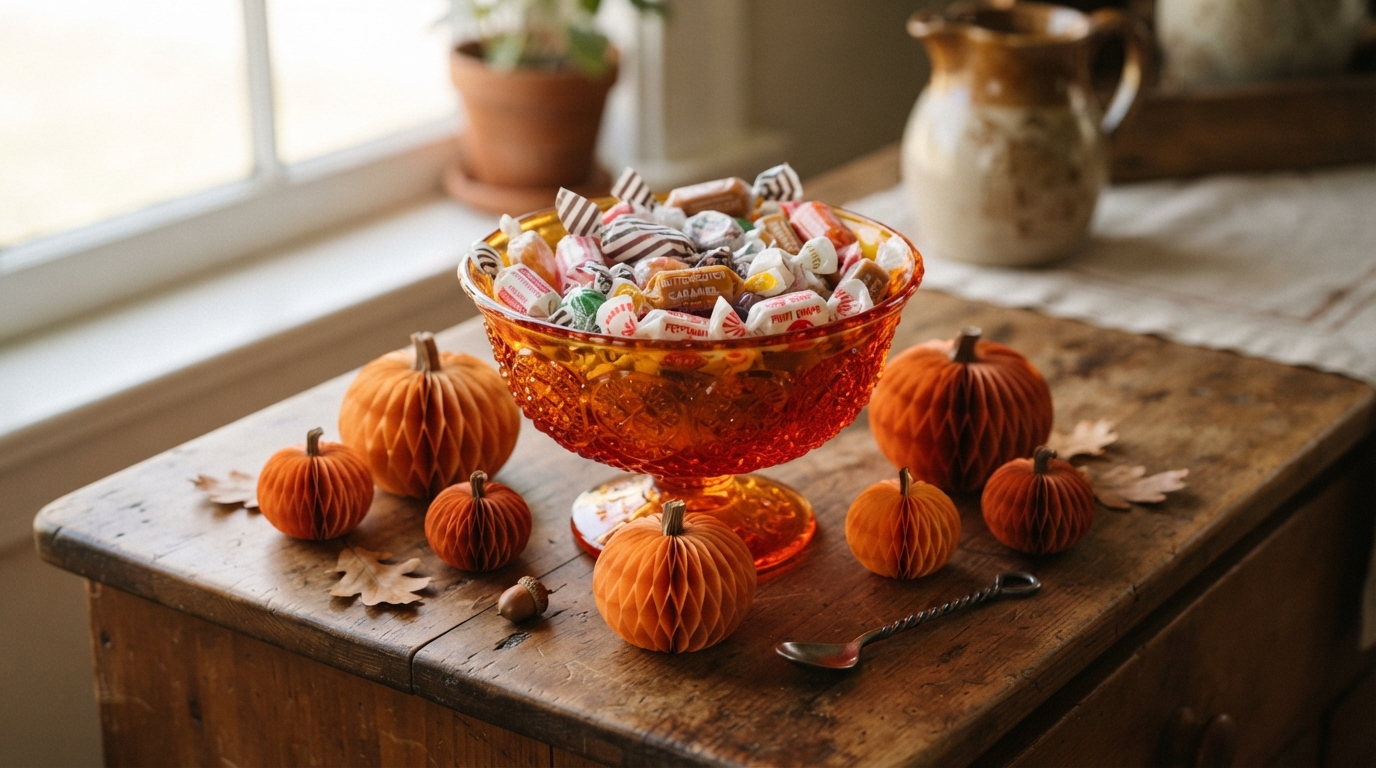
A colored glass bowl filled with old-fashioned wrapped candy is a simple but effective centerpiece. Tucking a few small paper pumpkins around the base adds height without crowding it.
Designer tip: Place it somewhere it catches window light — colored glass looks far richer when it’s actually illuminated.
- Classic wrapped sweets like taffy keep the look period-appropriate.
- An entryway console or dining buffet are both natural homes for this piece.
- Swapping candy for paper confetti works for a no-food version.
Most people skip this: A vinegar-and-water rinse restores the shine on vintage glass before it goes on display.
19. Handwritten Vintage-Style Place Cards
Simple crescent-moon or witch-hat shapes cut from cream cardstock, lettered by hand, add a small but meaningful personal touch to a holiday table. Slight imperfections in the handwriting only add to the charm.
Designer tip: Prop each card against a small pumpkin or a dried wheat sprig so it stays upright without a stand.
- A light tea-stain treatment ages plain cardstock convincingly.
- A simple stencil helps if you want a more uniform lettering style.
- These store flat and can be reused for several seasons.
Best shortcut: A gold paint pen lends the lettering a slightly more formal, mid-century polish.
20. Jadeite Green Dishes with Orange Accents
The milky green of Jadeite dishware is a striking, unexpected backdrop for classic Halloween orange. Orange napkins tucked between green plates keep the palette balanced rather than competing.
Designer tip: Add a few black taper candles to ground the brighter colors and keep the overall look from feeling too pastel.
- Modern reproduction Jadeite is widely available if vintage pieces are scarce.
- Amber glassware helps bridge the green-and-orange color transition.
- This combination works equally well for a daytime brunch table.
Most people skip this: Always check vintage dish bottoms for lead-content warnings before using them with food.
Table Centerpieces and Party Favors
21. A Tiered Pumpkin Centerpiece on a Cake Stand
Elevating a few papier-mâché pumpkins on a tiered cake stand turns simple pieces into a vertical showpiece. Wrapping the base in striped ribbon or crepe paper ruffles finishes the look.
Designer tip: Scatter a handful of small black cardstock stars around the base to fill gaps without adding clutter.
- Museum wax keeps lightweight pumpkins from rolling off the tiers.
- Mixing pumpkin sizes adds visual interest at each level.
- Center placement on the table keeps the display balanced from every seat.
Quick win: A black marker can freshen faded painted faces on older pumpkins.
22. Vintage Cracker-Style Party Favors
Paper-wrapped party favors shaped like old-fashioned crackers bring an interactive, celebratory element to a Halloween dinner. Filling them with wooden dice or retro candy keeps the contents in period.
Designer tip: Wrap sturdy cardboard tubes in crepe paper and finish the ends with velvet ribbon for a more substantial, less flimsy feel.
- Pre-cut kits or recycled tubes keep the total cost low.
- One favor per plate, or grouped in a bowl as a centerpiece, both work well.
- Swap paper patterns to lean either 1920s-spooky or 1950s-kitsch.
Quick win: A tiny printed fortune or riddle tucked inside sparks conversation at the table.
23. An Apothecary Jar Candy Collection
Clear glass jars of varying heights, filled with a single candy color theme, mimic an old general-store candy counter. Simplicity is the whole appeal here.
Designer tip: Tie plain twine around each jar’s neck with a small handwritten label for an extra layer of nostalgic detail.
- Lidded jars keep candy fresh throughout the season.
- Grouping three jars together is the easiest way to a balanced look.
- Kitchen counters and deep windowsills both suit this display well.
Best shortcut: A smaller glass nested inside the jar lets you use less candy while still looking full.
24. Paper Party Hats as Tabletop Decor
Vintage-style cone hats don’t have to be worn to earn their place at the table — grouped in the center on a dark runner, they add height and color without the expense of tall vases.
Designer tip: Tuck a little metallic fringe or tinsel around the base of each hat for a bit of extra sparkle.
- Hats with pom-poms or crepe fringe photograph especially well.
- A hidden bit of weighted clay keeps lightweight hats from tipping.
- These collapse flat for easy off-season storage.
Most people skip this: Ironing the table runner first keeps thin paper lying perfectly smooth underneath.
25. A Gingham Tablecloth Base
A checked gingham cloth gives a retro Halloween table a country, homespun starting point. Simple cream dishes let the pattern do most of the visual work.
Designer tip: Scatter small orange pumpkins and black cat cutouts along the table’s length rather than clustering them all in the center.
- Bold checks read as a statement; micro-checks feel more understated.
- Cotton or linen gingham washes easily for repeat use each year.
- The pattern pairs equally well with solid black or solid orange accents.
Quick win: A gingham runner instead of a full cloth shows off a nice wood table underneath.
’70s, ’80s, and ’90s Halloween Nostalgia
26. A Groovy Disco Ghost Display
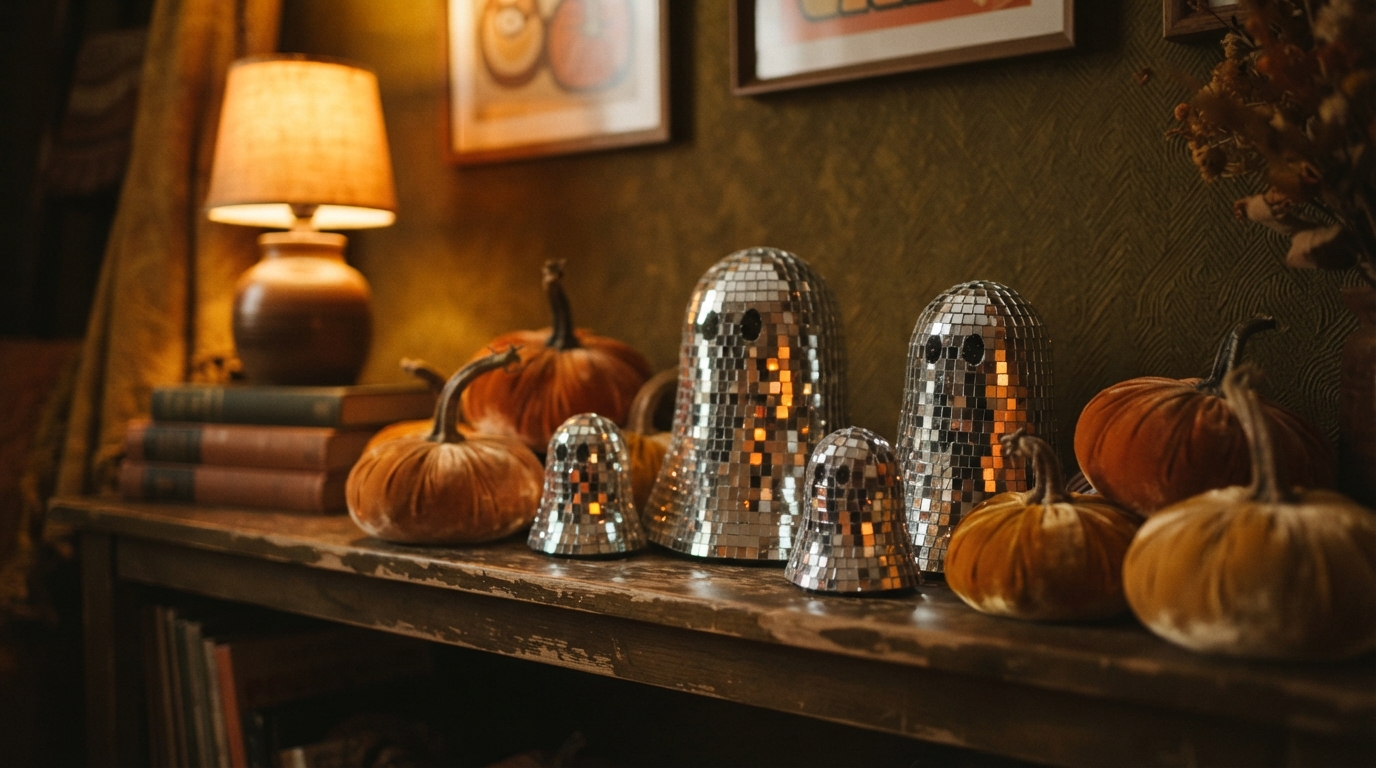
Applying tiny mirrored tiles to simple foam ghost shapes turns them into little light-scattering disco balls. Surrounding them with velvet pumpkins in soft orange and gold brings in the plush textures typical of the 1970s.
Designer tip: Position the ghosts near a lamp or window so the reflective tiles actually have light to bounce.
- Adhesive mirror tiles, sold online, make application mess-free.
- A direct light source is essential — without it, the effect disappears.
- Silver craft paper is a lighter substitute if glass tiles feel too heavy for foam.
Quick win: A small battery spotlight keeps the shimmer going after sunset.
27. A Roller-Rink Halloween Corner
Neon-style signage paired with a checkerboard floor mat instantly nods to late-’70s and ’80s party culture. Pastel ghosts and pumpkins mixed in break away from the standard orange-and-black palette.
Designer tip: A small hanging disco ball adds moving light patterns across the whole vignette.
- Battery-powered LED neon signs skip the cord-management headache.
- Real vintage roller skates as props sell the theme instantly.
- A tight five-color neon palette keeps the corner from looking chaotic.
Best shortcut: A checkerboard scarf draped over a shelf works if a full floor mat isn’t practical.
28. Classic Blow-Mold Pumpkin Pails
Lined-up blow-mold pails on a mantel or open shelf, filled with dried wheat or black glitter branches, add height and texture to a late-century display.
Designer tip: Vary heights within the group so the arrangement feels intentional rather than repetitive.
- Thrift stores and flea markets are the most reliable original sources.
- Newspaper stuffed in the base helps heavy branches stand upright.
- Mild soap and water cleans plastic without stripping any original paint.
Most people skip this: A battery tea light inside each pail makes the faces glow after dark.
29. Hand-Sewn Sheet Ghosts
Draping white cotton fabric over balloons or foam forms, with simple felt eyes and a mouth, recreates the distinctly hand-cut look many people remember from the 1990s.
Designer tip: Hang the ghosts at varying heights on clear fishing line so they appear to float rather than hang in a straight row.
- Old white bedsheets give a matte look that synthetic fabric can’t match.
- Spray starch helps the fabric hold its shape in a breeze.
- A small ceiling hook keeps the installation damage-free.
Quick win: Pinking shears on the bottom hem add a zig-zag detail while preventing fraying.
30. Black Cardstock Window Silhouettes
Large shapes cut from heavy black paper, taped inside a windowpane, read as solid shadow silhouettes from the street after dark.
Designer tip: Aim a colored floodlight at the window from the floor to make the silhouettes glow dramatically once the sun goes down.
- Measure each pane before cutting so shapes fit cleanly.
- Removable double-sided tape protects glass and keeps paper flat.
- Bold, simple outlines like bats or witches read best from a distance.
Best shortcut: Black contact paper offers a peel-and-stick version that stays perfectly flat.
Lighting, Vignettes, and Statement Pieces
31. Warm Orange Globe String Lights

Large orange globe bulbs strung along a porch railing or doorway give off a warmer, more nostalgic glow than today’s small LED strands. The bigger the bulb, the more retro the effect.
Designer tip: Wrap the lights tightly enough to hide the wire itself, keeping the visual focus entirely on the glowing bulbs.
- Ceramic-coated bulbs give the most convincing matte, vintage look.
- Gutter clips or hooks keep the installation clean and damage-free.
- Limit no more than three strands per outlet to avoid tripped fuses.
Best shortcut: A dusk-sensing plug turns the porch on automatically without anyone flipping a switch.
32. A Vintage Radio Vignette
An old tabletop radio, even a non-working one, anchors a small retro corner beautifully. Surrounding it with paper pumpkins and candy jars makes the space feel like a real lived-in mid-century home.
Designer tip: Hide a battery light inside a nearby candy jar for a soft secondary glow beside the radio.
- Antique malls and online auctions are good sources for Bakelite or tube-style radios.
- A lace doily or linen runner protects the tabletop underneath.
- A hidden Bluetooth speaker can quietly play old-style radio audio.
Best shortcut: Searching for archival period radio broadcasts online adds an immersive audio layer to the vignette.
33. A Black Feather Halloween Tree
A black-dyed feather tree brings a slightly gothic, old-world texture that fits the more Victorian side of vintage Halloween. Its wide-spaced branches show off small hanging ornaments beautifully.
Designer tip: Hang lightweight paper ornaments closer to the branch tips so the wire doesn’t sag under heavier pieces.
- Specialty holiday shops sometimes stock high-quality reproduction feather trees.
- Bend branches outward gently after unpacking to restore a symmetrical shape.
- Store upright in a tall box to protect the feather texture between seasons.
Most people skip this: Vintage-style wire “S” hooks look far more authentic than modern plastic hangers.
34. A Tea-Stained Pennant Banner
A simple pennant banner in blocky lettering defines a room’s theme instantly. Tea-stained edges or deliberately faded ink help a brand-new banner pass for a genuine old find.
Designer tip: Drape the banner in a soft arc across a mirror or large window rather than hanging it perfectly straight — the curve reads as more casual and vintage.
- Thick cardstock or felt banners hold up better than thin paper over a season.
- Clear suction cups hang banners on glass without any marks.
- A too-long banner can be split into two stacked rows instead.
Quick win: A light wash of diluted brown acrylic paint along the edges mimics decades of fading.
35. A Retro TV Vignette
Playing a loop of grainy, black-and-white Halloween-style footage on a television turns the screen itself into a piece of seasonal decor. Surrounding it with paper bats or small plastic pumpkins blends old and new.
Designer tip: Lower the screen brightness so the glow complements the room instead of overpowering it.
- Streaming platforms often carry vintage-style Halloween loop videos.
- Keep the volume muted to preserve a subtle, ambient mood.
- Clear surrounding clutter so the screen stays the visual focus.
Best shortcut: A simple static or scan-line loop gives a creepy ambiance without needing specific imagery.
Yard, Garden, and Outdoor Nostalgia
36. Simple White Ghost Yard Stakes

Flat, friendly white ghosts with simple black faces staked along flower beds or a walkway echo the minimalist lawn decor of mid-century neighborhoods far better than any inflatable figure could.
Designer tip: Space the ghosts about three feet apart to suggest gentle movement along the path rather than a static row.
- Painted plywood with black outdoor acrylic details is an easy DIY approach.
- Garden stakes screwed to the back keep the shapes upright in wind.
- Angling ghosts slightly toward the street improves visibility from passing cars.
Quick win: Reflective black paint on the eyes catches headlights for a subtle glowing effect after dark.
37. A Cornstalk-and-Pumpkin Harvest Porch
Combining carved pumpkins with cornstalks, hay bales, mums, and an old wooden chair creates a layered, timeless fall backdrop. One vintage black cat or witch figure is enough to tip the scene fully into Halloween.
Designer tip: Tie cornstalks to a porch pillar with thick twine so wind doesn’t topple them.
- Local farms and garden centers typically stock cornstalks by late September.
- Mixing heirloom and traditional pumpkins adds welcome texture variety.
- Fresh pumpkins can be swapped in as older ones soften in warm weather.
Most people skip this: A small string of orange lights tucked inside the cornstalks adds a subtle evening glow.
38. A Mid-Century Welcome Mat
A doormat featuring a smiling pumpkin, a black cat, or a starburst pattern in orange, black, cream, and muted yellow sets the tone before guests even reach the door.
Designer tip: Layer the themed mat over a larger plain black or striped rug to give the entryway more visual weight.
- Coir material holds up well and adds a naturally textured, old-fashioned look.
- Screen-printed designs resist fading better than digitally printed versions.
- A weekly shake-out keeps the printed colors looking sharp longer.
Quick win: A UV-protectant clear coat spray slows down sun fading on printed mats.
39. Vintage-Style Pulp Paper Porch Lanterns
Reproduction pulp-paper or papier-mâché lanterns lining a porch bring a soft, warm glow that plastic string lights simply can’t replicate. Battery-operated lights keep the paper safe from any open flame.
Designer tip: Set lanterns along a sturdy railing or wide ledge at eye level so the glow is easy to notice from the street.
- Wire-handled lanterns are easy to hang or set on a flat surface.
- Keeping lanterns under a roof protects delicate paper from dampness.
- Flicker-effect LED tea lights add a realistic candle look safely.
Best shortcut: Grouping three lanterns of different heights in one corner creates real lighting impact.
40. A Retro Multi-Color Bulb Display
Large old-style bulbs in orange, purple, and green offer a nostalgic alternative to today’s single-color LED strands. Their opaque coating softens the glow compared to sharp modern clear bulbs.
Designer tip: Layer strands along a mantel or porch railing rather than a single strand, mimicking how these lights were often doubled up decades ago.
- Ceramic-coated LED versions typically appear in stores by late August.
- Insulated plastic clips protect thicker vintage-style wiring better than metal staples.
- Swapping in amber and violet bulbs lets you fine-tune a specific retro color mood.
Most people skip this: Check connectivity limits on older incandescent strands before linking several sets together.
Media, Mixed Eras, and Finishing Touches
41. A Halloween Cassette and Record Vignette

Old media — vinyl sleeves, cassette tapes — displayed alongside seasonal pumpkins gives a shelf a distinctly analog, nostalgic feel. A handwritten party sign completes the look of an old-school invite.
Designer tip: Lean a record sleeve against a stack of books to give small pumpkins a backdrop instead of an empty shelf.
- Printable fake vintage album covers work fine if you don’t own real records.
- A small plate stand or wire easel keeps sleeves upright on a flat surface.
- A small dish of candy corn rounds out the vignette nicely.
Quick win: A blank cassette labeled by hand with a playful mix title makes an instant, cheap prop.
42. A ’90s-Style Homemade Wall
Construction paper cutouts and hand-drawn signs, taped in a slightly random pattern across a wall, recreate the energetic feel of a school Halloween party from the 1990s.
Designer tip: Use rolled painter’s tape on the back of each paper piece to protect wall paint while keeping decorations secure.
- Mixing matte and glossy paper adds texture to an otherwise flat wall.
- Letting the shapes be a little imperfect keeps the handmade feel genuine.
- Spacing pieces evenly, a few inches apart, gives the wall the best visual rhythm.
Most people skip this: A low hairdryer setting warms tape enough to peel cleanly at season’s end.
43. A Mixed-Decade Curated Collection
Blending pieces from several different eras works as long as everything sticks to a strict color story — usually orange, black, and cream. A mid-century honeycomb pumpkin can sit right next to an ’80s plastic pail if the palette lines up.
Designer tip: Place the largest pieces toward the back and layer smaller items in front for a sense of depth.
- Limiting a display to three main colors keeps a mixed-era collection looking curated.
- Small wooden blocks raise shorter back-row pieces for visibility.
- A dry microfiber cloth keeps vintage paper items free of moisture damage.
Quick win: A few new, deliberately aged pieces fill collection gaps without a big antiquing budget.
44. A Vintage Blow-Mold Owl and Autumn Corner
Paper or plastic owls with wide, exaggerated eyes fit naturally into a broader autumn display. Facing them toward the center of a room draws attention right where you want it.
Designer tip: Layer owls with real or faux dried leaves so the paper pieces feel grounded in a natural setting rather than floating alone.
- Owls with jointed, posable wings add a more custom, playful touch.
- Honeycomb-bodied designs bring three-dimensional texture to flat shelves.
- Pairing paper owls with plush velvet pumpkins balances different textures nicely.
Most people skip this: Mixing textures — paper, velvet, ceramic — is what keeps a retro shelf from feeling one-note.
45. Mercury Glass Pumpkins for a Polished Finish
Mercury glass pumpkins bring a mottled, silvery shimmer that reads as more elegant than plastic while still feeling nostalgic. Their metallic surface catches candlelight beautifully in the evening.
Designer tip: Cluster three different heights together for an easy rule-of-three arrangement that still looks intentional.
- Home decor stores typically stock these heavily in September and October.
- A mirrored tray beneath them doubles the reflective glow and protects furniture.
- A few silver-toned accent pieces help break up an otherwise solid orange palette.
Quick win: A soft microfiber wipe before displaying removes fingerprints that dull the metallic shine.
Final Touches and Everyday Details
46. Papier-Mâché Pumpkin Treat Buckets
Reproduction papier-mâché buckets with wire handles are equally at home holding candy, dried flowers, or a few battery candles. Their matte, textured surface reads as far more authentic than glossy plastic.
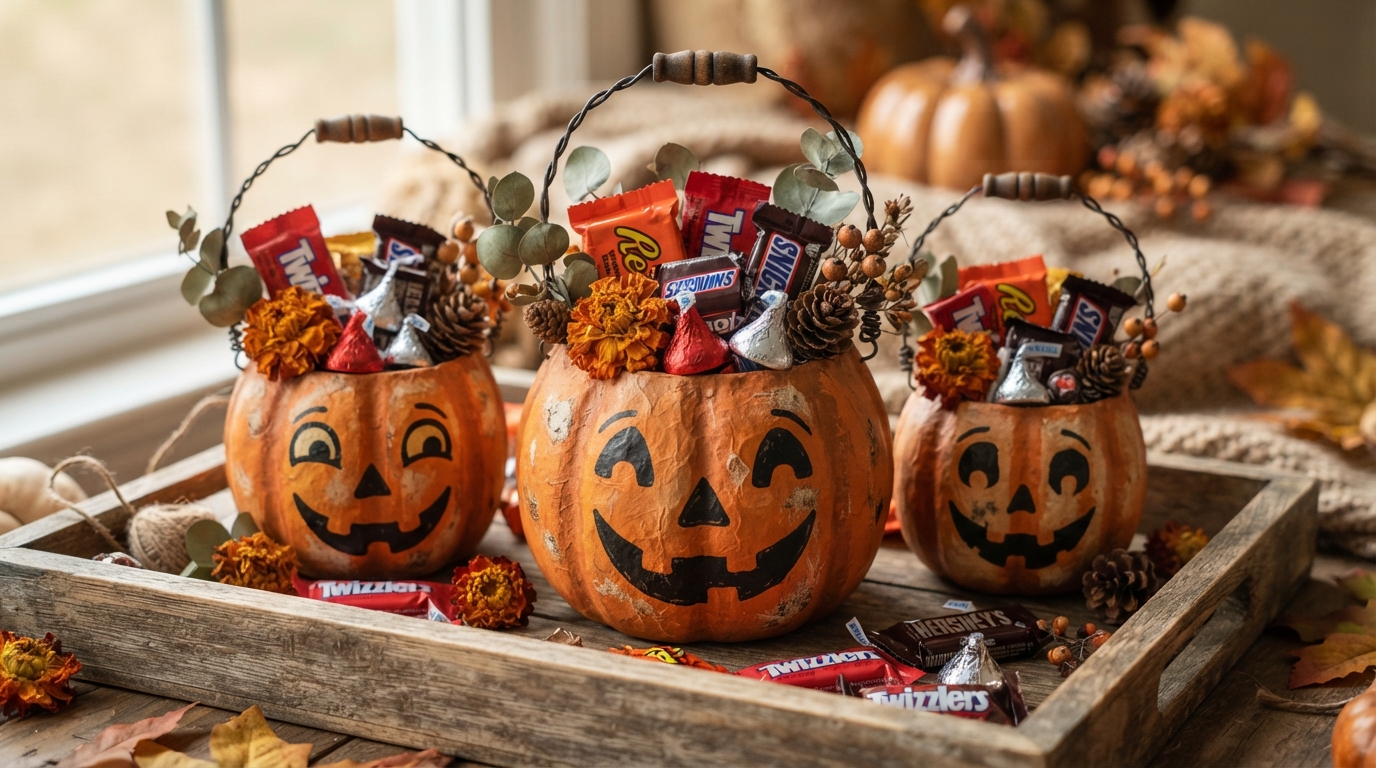
Designer tip: Line the bottom with tissue paper so lighter contents sit higher, giving the bucket a fuller look without needing to fill it completely.
- Hand-painted reproductions capture the antique matte finish best.
- Keep these away from humidity, since papier-mâché can soften over time.
- Grouping three different sizes on a tray makes an easy centerpiece.
Quick win: Battery tea lights avoid any heat risk to the delicate material.
47. A Retro Garland Across a Doorway or Mantel
A strung-together garland of paper pumpkins, cats, ghosts, and moons is one of the fastest ways to add old-fashioned character to a doorway or staircase.
Designer tip: Loop the garland over a large mirror rather than nailing anything to the wall, framing the room with zero permanent changes.
- Look for garlands with long end strings for easier tying to railings or rods.
- Even character spacing keeps the swag looking balanced when draped.
- Layering two garlands together adds fullness and mixes up the characters.
Best shortcut: Draping a garland straight over a curtain rod skips drilling entirely.
48. Twisted Crepe Paper Ceiling Streamers
Twisted orange and black crepe paper draped across a ceiling recreates the simple, cheerful feel of a mid-century Halloween party almost instantly, for very little cost.
Designer tip: Secure each end with a small twist so the spiral shape holds and doesn’t sag over time.
- Flame-resistant jumbo rolls cover large ceilings safely and efficiently.
- Low-tack painter’s tape avoids peeling paint when the season ends.
- Draping streamers outward from a central light fixture gives a classic “big top” effect.
Quick win: Twisting from both ends in opposite directions before taping gives a cleaner, more uniform spiral.
49. Smiling Moon-Face Accents Throughout the Room
Crescent and full-moon faces scattered among witches, cats, and gold stars build a whimsical night-sky theme that ties a whole room together.
Designer tip: Hang the largest moon slightly higher than everything else so it acts as a visual anchor for the rest of the display.
- Mixing pale yellow moons with black silhouettes creates useful contrast against neutral walls.
- Small foil stars on removable adhesive extend the theme across a bigger wall.
- Double-sided moons look good from both indoors and out when placed in a window.
Best shortcut: Clear fishing line makes hanging moons from the ceiling look like they’re floating.
50. A Signature Anchor Piece That Ties It All Together
Every strong retro Halloween display benefits from one clear anchor — a fireplace mantel, a bar cart, or a single statement piece that everything else builds around. It keeps a mix of vintage items from feeling scattered.
Designer tip: Choose the anchor first, then add supporting pieces in decreasing size and visual weight around it.
- A dedicated “vintage zone” keeps a themed collection from clashing with modern furniture elsewhere in the home.
- Rotating smaller supporting pieces each year keeps a permanent anchor feeling fresh.
- Photographing the finished setup helps you recreate or improve on it next season.
Quick win: Step back ten feet before finalizing — most styling flaws are only visible from a distance.
Frequently Asked Questions
What brands are considered the most collectible for retro Halloween decor? Beistle and Luhrs are the names most associated with the classic mid-century paper die-cut look, while Union Products is generally regarded as the standard-bearer for vintage-style blow-mold lawn figures.
How should I care for delicate vintage paper decorations? Acid-free adhesive and archival tape protect paper without leaving residue, and truly rare pieces are best kept behind glass in a simple frame rather than handled each season.
What actually separates 1950s Halloween decor from 1970s Halloween decor? 1950s pieces tend toward detailed, illustrative paper goods with charming rather than scary characters, while the 1970s shifted toward bolder color and heavier use of plastic, including the blow-mold pieces many people now collect.
How do I blend retro Halloween decor with an otherwise modern home? Pick one anchor spot — a mantel, console, or bar cart — and let that be the dedicated vintage zone, rather than scattering pieces throughout every room.
Where can I find good-quality reproduction pieces if I can’t source real vintage? Companies like Bethany Lowe Designs and Beistle both produce modern reproductions that stay close to the original mid-century look, and several boutique home decor sites specialize in this aesthetic each fall.